Learn how to upload images into Cricut design space to create stickers, labels, and decals with this step by step guide for beginners.
If you would rather print the PDF version to reference it at a later date, click here.


Step 1: Open a new project in Cricut Design Space

Step 2: Click “Upload” on the left

STEP 3: Click on “upload image”

Tip: Make sure the file is in format .png, .jpg, .gif, .svg, .dxf, or .bmp before uploading.

STEP 5: select the image type
Tip: The more color and detail an image has the higher the “Complex” we need to go with.
In this example, this file only has 1 shape and 1 color I need, so I will choose Simple.

STEP 6: Use the “select & erase” wand tool or eraser on the left-hand side to remove any part of the image you do not want

STEP 7: Use the “preview” button on the bottom to preview your image to make sure you erased all the unwanted parts

 Always make sure you use the preview button before clicking next in case you forget to remove any sections, the example below shows the preview without removing the white behind the heart.
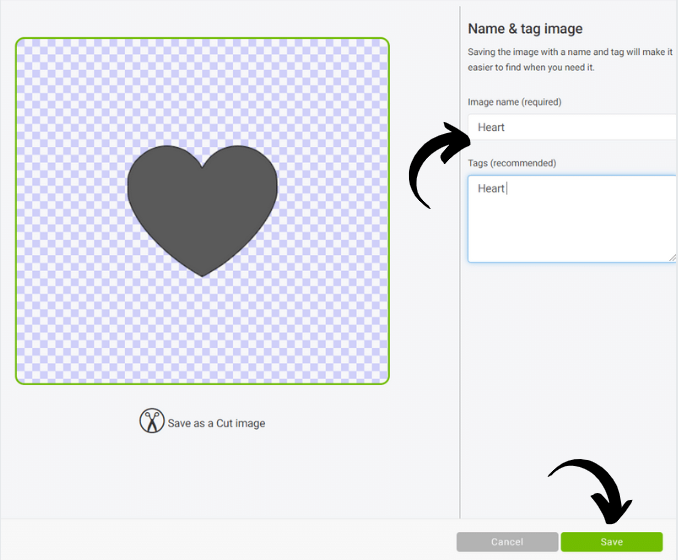
STEP 8:DECIDE WHETHER YOU WOULD LIKE TO SAVE THIS IMAGE AS A PRINT THEN CUT OR AS A CUT IMAGE
Since this is just a solid heart (nothing special) I will save this image as a Cut, since I can cut this image out of any color adhesive vinyl there is no need to print this in this color.

TIP: YOU WILL WANT TO USE THE PRINT THEN CUT WHEN THE IAMGE HAS A LOT MORE DETAIL THAN YOU CAN ACCOMPLISH WITH SOLID COLORS ADHESIVE VINYL, SEE EXAMPLE BELOW
The below T-rex image I used Complex with uploading the image and saved as a print then cut because of all the details

STEP 9: NAME & TAG YOUR IMAGE (EASIER TO FIND LATER) AND CLICK “SAVE”
STEP 10: THAT’S IT! YOUR IMAGE WILL POP UP UNDER THE “RECENTLY UPLOADED IMAGES” TO ADD IT TO YOUR CANVAS, CLICK THE IMAGE AND CLICK “INSERT IMAGE” ON THE BOTTOM RIGHT

 Let me know in the comments below if you have any questions about on how to upload any image into Cricut Design Space!
I hope this tutorial helped you with any questions or frustrations with uploading images for your Cricut Projects and if it did, do not forget to share with anyone you know that might benefit.
Don’t forget to click here. for the printable version of these steps that you can keep in your workspace near your Cricut or digitally on your computer for easy access whenever you need it!
Let me know in the comments below if you have any questions about on how to upload any image into Cricut Design Space!
I hope this tutorial helped you with any questions or frustrations with uploading images for your Cricut Projects and if it did, do not forget to share with anyone you know that might benefit.
Don’t forget to click here. for the printable version of these steps that you can keep in your workspace near your Cricut or digitally on your computer for easy access whenever you need it!
Also make sure to follow me on Instagram, Pinterest and Facebook for more DIY inspiration, Cricut tutorials and much more!
Have a Crafty day!
